【Swift】Fabricを使ってTwitterクライアントアプリを作ってみる 〜その3〜
この記事は以下の記事の続きとなっております。
今回行ったことは、
- ツイート機能の実装
のみです!!
それでは張り切って行きましょー!!
ツイート機能の実装
ナビゲーションバーにツイートボタンを追加し、tappedRightBarButton()を実行します。
import Foundation
import TwitterKit

class TimelineViewController: UIViewController, UITableViewDataSource, UITableViewDelegate {
    var tableView: UITableView!
    var tweets: [TWTRTweet] = [] {
        didSet {
            tableView.reloadData()
        }
    }
    var prototypeCell: TWTRTweetTableViewCell?
    var userId: String?
    var rightBarButton: UIBarButtonItem!

    override func viewDidLoad() {
        super.viewDidLoad()
        rightBarButton = UIBarButtonItem(title: "tweet", style: .plain, target: self, action: "tappedRightBarButton")
        self.navigationItem.rightBarButtonItem = rightBarButton
        tableView = UITableView(frame: self.view.bounds)
        tableView.delegate = self
        tableView.dataSource = self

        prototypeCell = TWTRTweetTableViewCell(style: .default, reuseIdentifier: "cell")

        tableView.register(TWTRTweetTableViewCell.self, forCellReuseIdentifier: "cell")
        self.view.addSubview(tableView)

        loadTweets()
    }

    func loadTweets(){
        TwitterAPI.getHomeTimeline(user: userId, tweets: {
            twttrs in
            for tweet in twttrs {
                self.tweets.append(tweet)
            }
        }, error: {
            error in
            print(error.localizedDescription)
        })
    }

    func tableView(_ tableView: UITableView, numberOfRowsInSection section: Int) -> Int {
        return tweets.count
    }

    func tableView(_ tableView: UITableView, cellForRowAt indexPath: IndexPath) -> UITableViewCell {
        let cell = tableView.dequeueReusableCell(withIdentifier: "cell") as! TWTRTweetTableViewCell

        let tweet = tweets[indexPath.row]
        cell.configure(with: tweet)

        return cell
    }

    func tableView(_ tableView: UITableView, heightForRowAt indexPath: IndexPath) -> CGFloat {
        let tweet = tweets[indexPath.row]

        prototypeCell?.configure(with: tweet)

        if let height: CGFloat = TWTRTweetTableViewCell.height(for: tweet, style: .regular, width: self.view.bounds.width, showingActions: true){
            return height
        }else{
            return tableView.estimatedRowHeight
        }
    }

    func tappedRightBarButton(){
        let composer = TWTRComposer()
        composer.show(from: self, completion: {
            result in
            if (result == TWTRComposerResult.cancelled){
                print("tweet composetion cancelled")
            }else{
                print("sending tweet!!")
            }
        })
    }
}
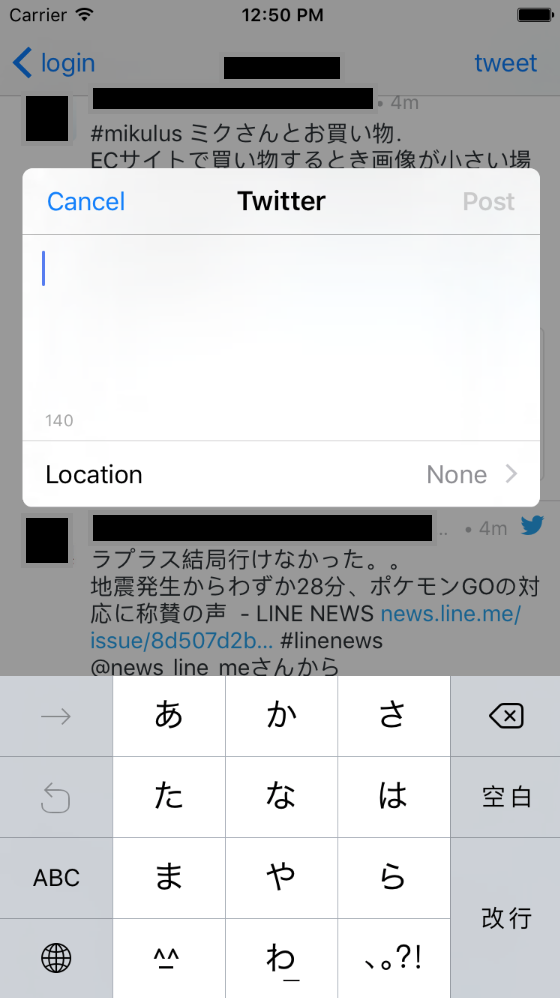
TWTRComposerというクラスを利用します。すると。。。

こんな感じになります!!
今後
今回はTwitter Kit のみでしたが、Fabricには他にも色々な機能があるので、今後試してみようと思います!!
無限スクロールや、リロード機能も実装したかったなー。。。
最後に
Fabricを初めて使ってみましたが、Swift初心者の自分でも比較的簡単にTwitterクライアントアプリを作ることがきました。ただ、古い情報だと、そのままは使えなかったりします。
この記事が、これから使ってみようかなという方の参考になれば幸いです。